Long story short, I'm creating a new custom heads up display HUD for my car. The car already comes with a HUD but I wanted something more modern looking and I think this project will be a great challenge for me.
I honestly really love this new project. I love the hardware aspect. I love the software aspect. I love the framework I've built. I think it's going to be seriously awesome when finished. I'm even adding bluetooth support to the HUD so I can adjust options and update the software from my phone. I also have micro-sd card support so I can store images on there and use them as boot up screens. All in all it's going to be awesome and I can't wait to road-test it.
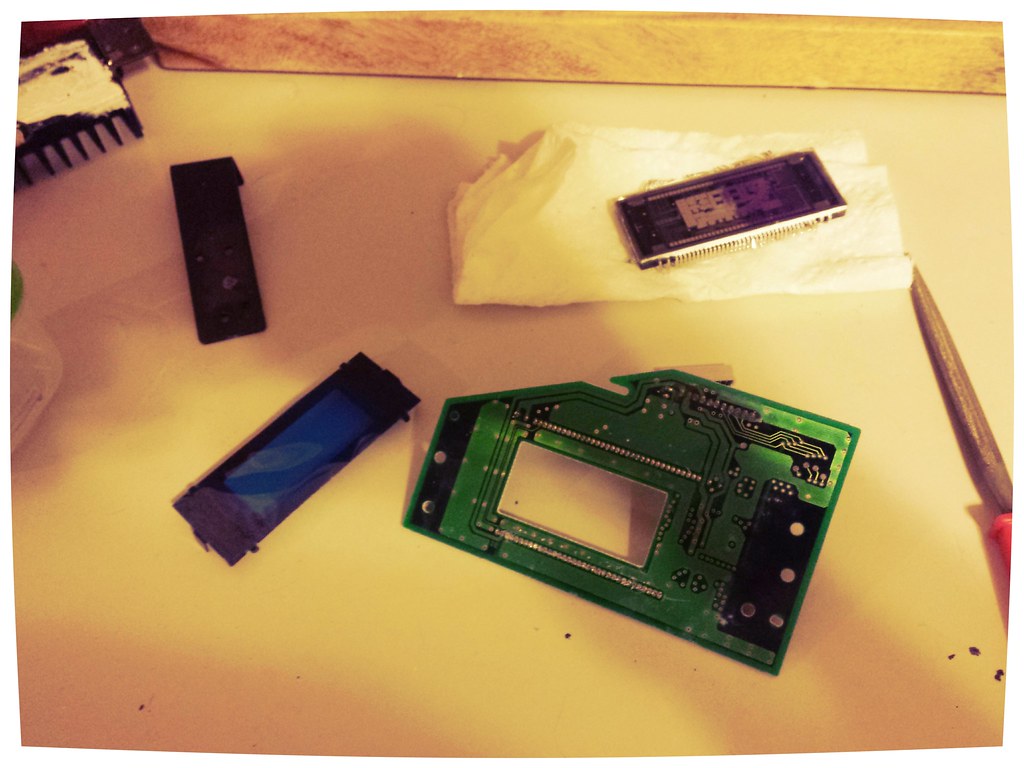
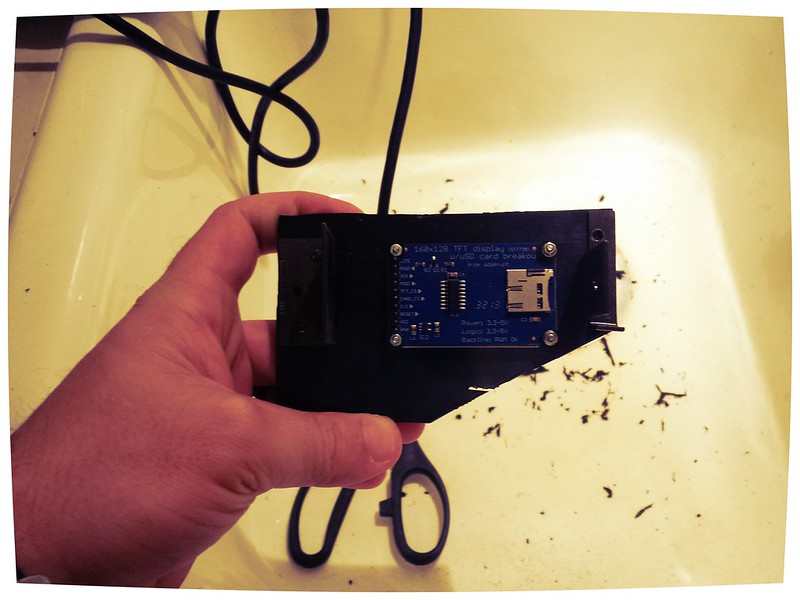
So let's start with where I am. Last week I got a used GM HUD and took it apart. After examining the whole thing I've come to realize that there is only 1 piece that I really need to replace and that is the circuit board for the display (that's the picture in the post you see above). The entire rest of the unit can stay exactly as-is. Once I knew that, it was time to get to work. I started with the software part. I wanted to get something started before I tried to mount my HUD into the GM HUD. This is my little setup.
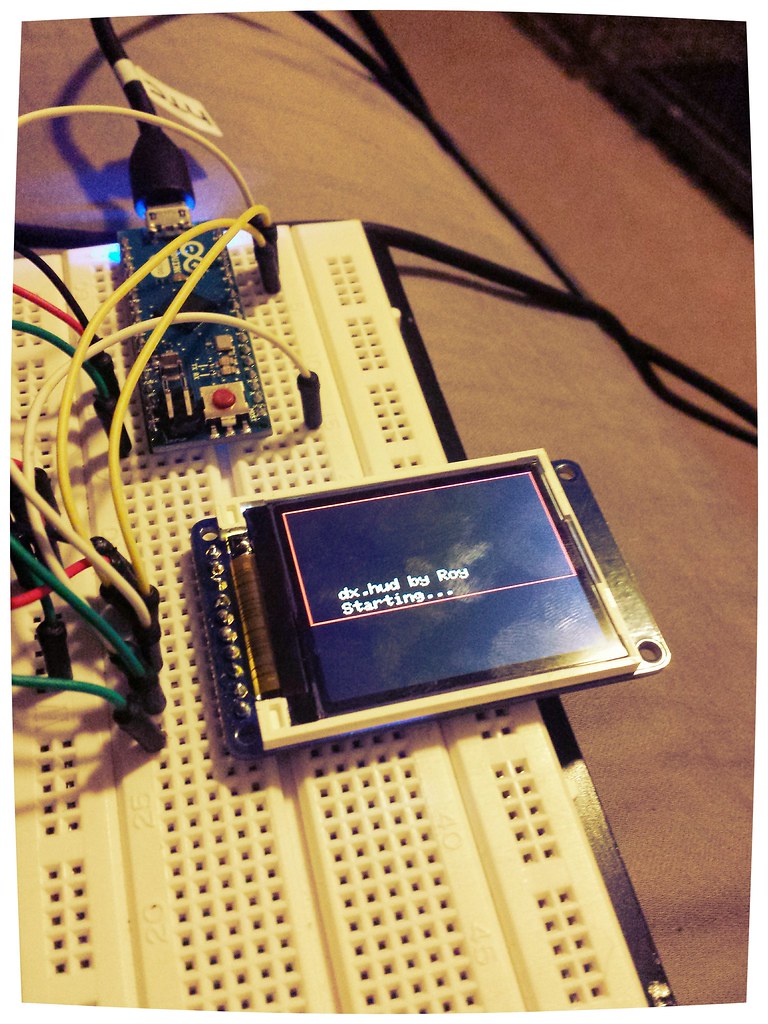
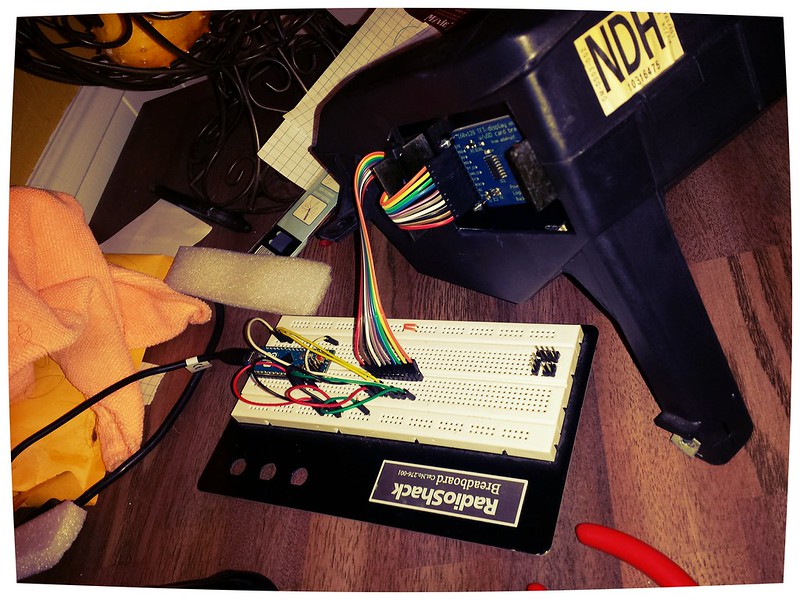
I'm using an Arduino to control the screen. I only have 32KB of space to work with. I can upgrade to a 256KB unit in the future but I want to see if I can make the core fit in 32KB first. What you can't see in this picture is the micro-sd port on the other side. The red box you see on the screen is actually the usable HUD area. It looks tiny, right? That was one of the most surprising things about the GM HUD. The actual HUD screen is very tiny.
Once I had that running well enough, I wanted to see if I could get it mounted in the GM HUD. Time to fabricate :]
Remember that the piece I wanted to replace is the green one in the post above this. I started by taking it all apart so I can re-use some pieces.
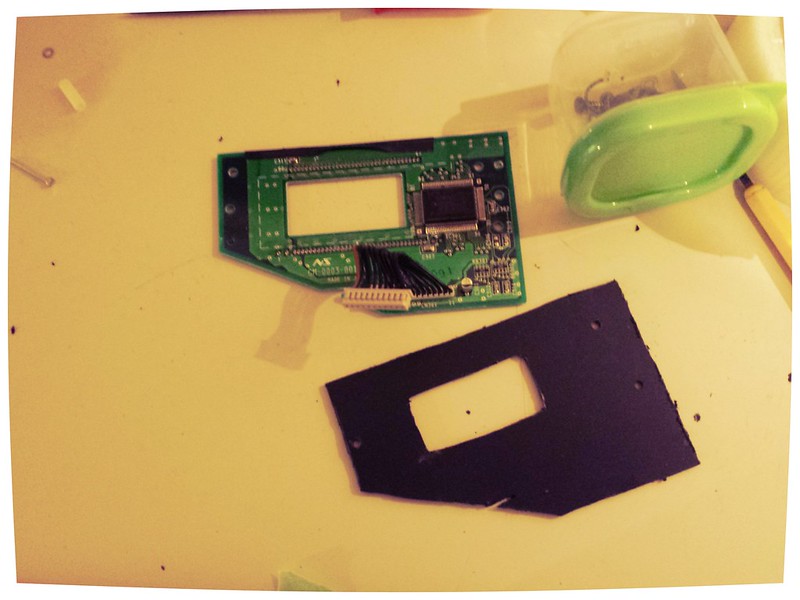
Next came the shape cutting. It's not perfect but it'll do for now. For the final piece I'll have this 3d-printed.
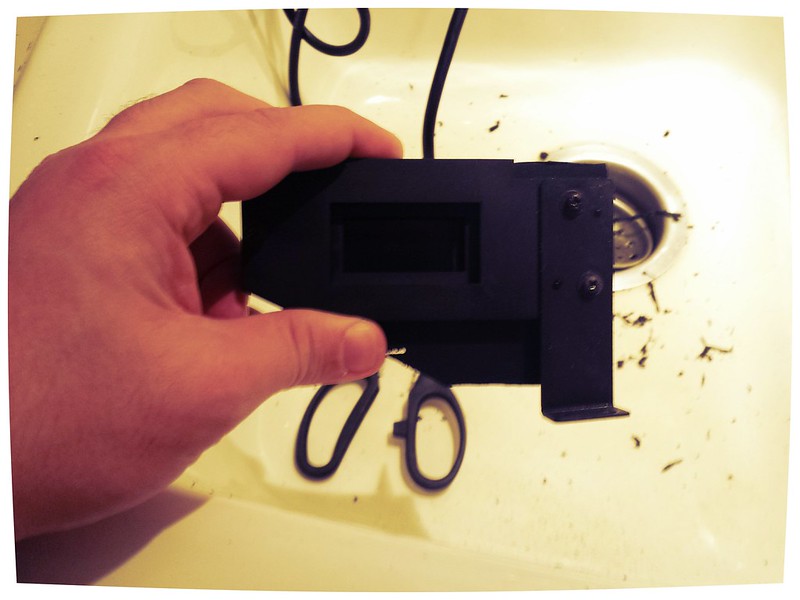
Once I got that fixed up, mounting the screen was easy. You can see the micro-sd card in the 2nd picture.
Once that was done, we connect everything.
.... and voila!
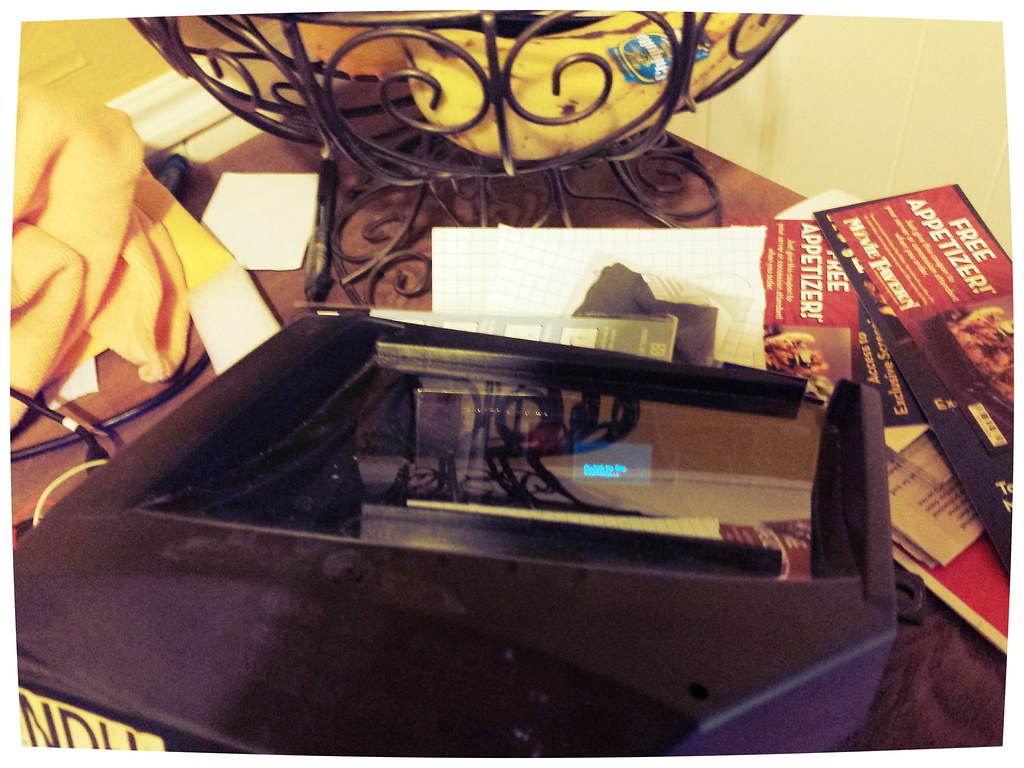
This will definitely be tweaked before the final version but at least I can now test and play with everything while it's sitting inside an actual HUD unit. The picture is surprisingly clear through all that glass.
Next step is going to be continuing the software development aspect. Flipping the image left->right will be a pretty simple task. From there I'll start to actually build screens. I'm also going to need to take my dash apart at some point so I can sniff the serial line that feeds into the HUD. I'm crossing my fingers and hoping that it's something I can use to read/request data from the computer. If not I am going to have to run a line down to the ODB II port. If anyone happens to know any software people inside GM that might've worked on the HUD, feel free to send me their contact info :]
I honestly really love this new project. I love the hardware aspect. I love the software aspect. I love the framework I've built. I think it's going to be seriously awesome when finished. I'm even adding bluetooth support to the HUD so I can adjust options and update the software from my phone. I also have micro-sd card support so I can store images on there and use them as boot up screens. All in all it's going to be awesome and I can't wait to road-test it.
So let's start with where I am. Last week I got a used GM HUD and took it apart. After examining the whole thing I've come to realize that there is only 1 piece that I really need to replace and that is the circuit board for the display (that's the picture in the post you see above). The entire rest of the unit can stay exactly as-is. Once I knew that, it was time to get to work. I started with the software part. I wanted to get something started before I tried to mount my HUD into the GM HUD. This is my little setup.
I'm using an Arduino to control the screen. I only have 32KB of space to work with. I can upgrade to a 256KB unit in the future but I want to see if I can make the core fit in 32KB first. What you can't see in this picture is the micro-sd port on the other side. The red box you see on the screen is actually the usable HUD area. It looks tiny, right? That was one of the most surprising things about the GM HUD. The actual HUD screen is very tiny.
Once I had that running well enough, I wanted to see if I could get it mounted in the GM HUD. Time to fabricate :]
Remember that the piece I wanted to replace is the green one in the post above this. I started by taking it all apart so I can re-use some pieces.
Next came the shape cutting. It's not perfect but it'll do for now. For the final piece I'll have this 3d-printed.
Once I got that fixed up, mounting the screen was easy. You can see the micro-sd card in the 2nd picture.
Once that was done, we connect everything.
.... and voila!
This will definitely be tweaked before the final version but at least I can now test and play with everything while it's sitting inside an actual HUD unit. The picture is surprisingly clear through all that glass.
Next step is going to be continuing the software development aspect. Flipping the image left->right will be a pretty simple task. From there I'll start to actually build screens. I'm also going to need to take my dash apart at some point so I can sniff the serial line that feeds into the HUD. I'm crossing my fingers and hoping that it's something I can use to read/request data from the computer. If not I am going to have to run a line down to the ODB II port. If anyone happens to know any software people inside GM that might've worked on the HUD, feel free to send me their contact info :]
No comments:
Post a Comment